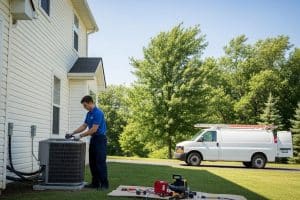
 Installing a new air conditioning system is a significant investment that can greatly enhance your home’s comfort, especially during the sweltering summer months. However, many homeowners are often unaware of the complexities involved in the installation process. This article aims to demystify the steps involved in air conditioner installation, ensuring you are well-informed and prepared for the journey ahead.
Evaluating Your Cooling Needs
Before any installation can take place, it is essential to assess your home’s specific cooling requirements. This evaluation is crucial for selecting the right air conditioning unit that will efficiently cool your space without wasting energy.
Manual J Calculation
One of the most effective methods for determining your cooling needs is the Manual J calculation. This process takes into account various factors, including:
-
- Home Size: The square footage of your home directly impacts the size of the air conditioning unit required.
- Insulation Quality: Well-insulated homes retain cool air better, potentially allowing for a smaller unit.
- Window Types: The number and type of windows can affect heat gain and loss.
- Local Climate: Understanding the typical weather patterns in your area helps in selecting an appropriate system.
By accurately calculating your cooling needs, you can avoid the pitfalls of choosing an undersized or oversized unit, both of which can lead to inefficiencies and increased energy costs.
Site Preparation
Once you have determined the appropriate air conditioning system, the next step is to prepare the installation site. Proper site preparation is vital for ensuring a smooth installation process.
Cleaning the Area
Begin by clearing the installation area of any debris, furniture, or obstacles. A clean workspace not only facilitates the installation but also minimizes the risk of damage to your property or the equipment.
Electrical Inspection
Before installation, it is crucial to inspect the existing electrical wiring. Ensure that the electrical panel can handle the new system’s power requirements. If any repairs or upgrades are needed, address them before the installation team arrives.
Choosing the Right Equipment
Selecting the right air conditioning unit is a critical step in the installation process. The choice of equipment will significantly impact the efficiency and effectiveness of your cooling system.
Indoor Unit Selection
When choosing an indoor unit, consider the following factors:
-
- Type of System: Options include central air conditioning, ductless mini-splits, and window units. Each has its advantages and disadvantages based on your home’s layout and cooling needs.
- Energy Efficiency: Look for units with high SEER (Seasonal Energy Efficiency Ratio) ratings, which indicate better energy efficiency and lower operating costs.
- Size: Ensure the unit is appropriately sized for your space to avoid inefficiencies.
Outdoor Unit Considerations
The outdoor unit is equally important for the overall performance of your air conditioning system. Key considerations include:
-
- Location: Position the unit in a shaded area to enhance efficiency and reduce wear and tear.
- Mounting: Ensure the unit is securely mounted on a stable surface, such as a concrete pad, to prevent vibrations and movement.
Installation of Indoor and Outdoor Units
With the equipment selected and the site prepared, the actual installation can begin. This process involves several key steps.
Installing the Indoor Unit
The installation of the indoor unit typically involves:
-
- Mounting the Unit: Secure the indoor unit to the wall or ceiling, ensuring it is level and properly positioned for optimal airflow.
- Connecting Ductwork: If applicable, connect the ductwork to the indoor unit, ensuring all joints are sealed to prevent air leaks.
- Electrical Connections: Connect the unit to the electrical supply, following all safety codes and regulations.
Installing the Outdoor Unit
The outdoor unit installation includes:
-
- Positioning the Unit: Place the outdoor unit on the prepared pad, ensuring it is level and stable.
- Connecting Refrigerant Lines: Run the refrigerant lines from the indoor unit to the outdoor unit, ensuring they are properly insulated and secured.
- Electrical Wiring: Connect the outdoor unit to the electrical supply, ensuring all connections are secure and compliant with local codes.
Ensuring Proper Ventilation and Ductwork
For an air conditioning system to function efficiently, proper ventilation and ductwork are essential.
Duct Inspection
Before finalizing the installation, inspect the existing ductwork for any leaks, damage, or insulation deficiencies. Sealing leaks and repairing damaged sections will enhance airflow and improve the overall efficiency of your system.
Ventilation Setup
Ensure that the ventilation system is designed to promote optimal airflow throughout your home. This may involve adjusting the placement of vents or adding additional ducts to ensure even cooling.
Testing and Calibration
Once the installation is complete, the system must be thoroughly tested and calibrated to ensure it operates correctly.
System Testing
Technicians will conduct a series of tests to verify that the system is functioning as intended. This includes checking for:
-
- Airflow Issues: Ensuring that air is flowing freely through the ducts and vents.
- Refrigerant Levels: Verifying that the refrigerant levels are within the manufacturer’s specifications.
- Electrical Functionality: Ensuring all electrical components are functioning correctly.
Calibration
Calibration involves adjusting the system settings to optimize performance. This may include setting the thermostat, adjusting airflow rates, and ensuring that the system operates efficiently under various conditions.
Sealing and Insulating Gaps
To maximize energy efficiency, it is crucial to seal and insulate any gaps around the air conditioning unit.
Insulation Techniques
Use foam insulation or weatherstripping to seal any openings around the unit. This helps prevent air leaks and improves the overall efficiency of your cooling system.
Additional Measures
Consider applying caulk or expanding foam to fill any crevices around vents and chimneys. Proper insulation will help maintain a consistent indoor temperature and reduce energy costs.
Final Inspection and Adjustments
After the installation and testing phases, a final inspection is necessary to ensure everything is in order.
Comprehensive Review
Technicians will conduct a thorough review of the installation, checking for:
-
- Refrigerant Levels: Ensuring that the refrigerant is at the correct level for optimal performance.
- Electrical Components: Verifying that all electrical connections are secure and functioning properly.
- Thermostat Accuracy: Adjusting the thermostat to ensure it accurately reflects the desired temperature.
Addressing Issues
If any issues are identified during the final inspection, technicians will address them promptly to ensure the system operates efficiently.
Customer Education and System Startup
An essential part of the installation process is educating the homeowner about the new system.
Operating Instructions
Technicians will provide instructions on how to operate the thermostat and adjust settings for optimal comfort. Understanding how to use the system effectively can lead to significant energy savings.
Maintenance Tips
Homeowners will also receive guidance on routine maintenance tasks, such as changing filters and cleaning the outdoor unit. Regular maintenance is crucial for prolonging the life of the air conditioning system.
Post-Installation Cleanup
After the installation is complete, a thorough cleanup is necessary to leave the area in pristine condition.
Removing Debris
Technicians will remove all installation debris, including packaging materials and old equipment. This ensures that your home remains clean and free of hazards.
Final Walkthrough
A final walkthrough with the homeowner allows technicians to explain the installation process and answer any questions. This step ensures that you are fully informed about your new air conditioning system.
Warranty Information and Maintenance Plans
Understanding warranty coverage and maintenance plans is vital for protecting your investment.
Warranty Coverage
Most air conditioning systems come with warranties that cover parts and labor for a specified period. Be sure to register your system to ensure you receive the full benefits of the warranty.
Maintenance Plans
Consider enrolling in a maintenance plan offered by your HVAC contractor. Regular maintenance can help prevent costly repairs and extend the lifespan of your system.
Installing a new air conditioning system involves several critical steps, from evaluating your cooling needs to ensuring proper installation and maintenance. By understanding the entire process, you can make informed decisions and ensure that your new system operates efficiently for years to come. Whether you choose to hire a professional or take on the project yourself, being knowledgeable about the installation process will help you achieve the best results for your home’s comfort.
We Provide Air Conditioning Installation, Repair, & Maintenance Services
In South Florida’s demanding tropical climate, professional air conditioning installation, repair, and maintenance services aren’t just conveniences—they’re necessities for year-round comfort and well-being. With relentless heat and humidity that can stress even the most robust systems, our expert technicians provide comprehensive solutions including energy-efficient installations, emergency repairs, and preventative maintenance programs designed specifically for the region’s unique challenges.
> Learn More
Contact Us (954-324-1406) for a Free Consultation!
—
 About Duct and AC Masters
Duct and AC Masters is South Florida’s premier solution for all your air system needs. Our certified professionals, competitive pricing, and commitment to customer satisfaction ensure that your HVAC system performs at its best.

 About Duct and AC Masters